
This year Michael’s has asked me to decorate their…
Merry Memories Dream Tree!!
If you’re new to Turtle Creek Lane, first things first….. you should know everything I decorate tells a STORY! It’s just more FUN that way!
Here’s the story of my Michael’s Merry Memories Dream Tree!
So let’s face it, no one likes taking down their Christmas tree. The fun part is putting it up! Right? The take-down part is a chore and a sure sign the season has come to an end…. sigh… As I was pondering this,
I had a brilliant — beyond brilliant idea!!
My friends and I love baking cookies together; but (except for my friend Julie), we don’t like taking down seasonal decor together! So…. why not do them both simultaneously?!!
Bake Holiday Cookies while undecorating the Christmas tree!
Let me explain!
I’ve designed the Dream Tree so that the “undecorating part” of it is tied to making your Holiday Cookies! In other words, for the most part,
everything needed to bake cookies is an “ornament” on the tree!
In order to have the “supplies” to bake the cookies, we will need to take them off the tree!!
Isn’t this the most fun idea EVER?!!!!
Let me tell you how I designed it!
Step By Step Directions!
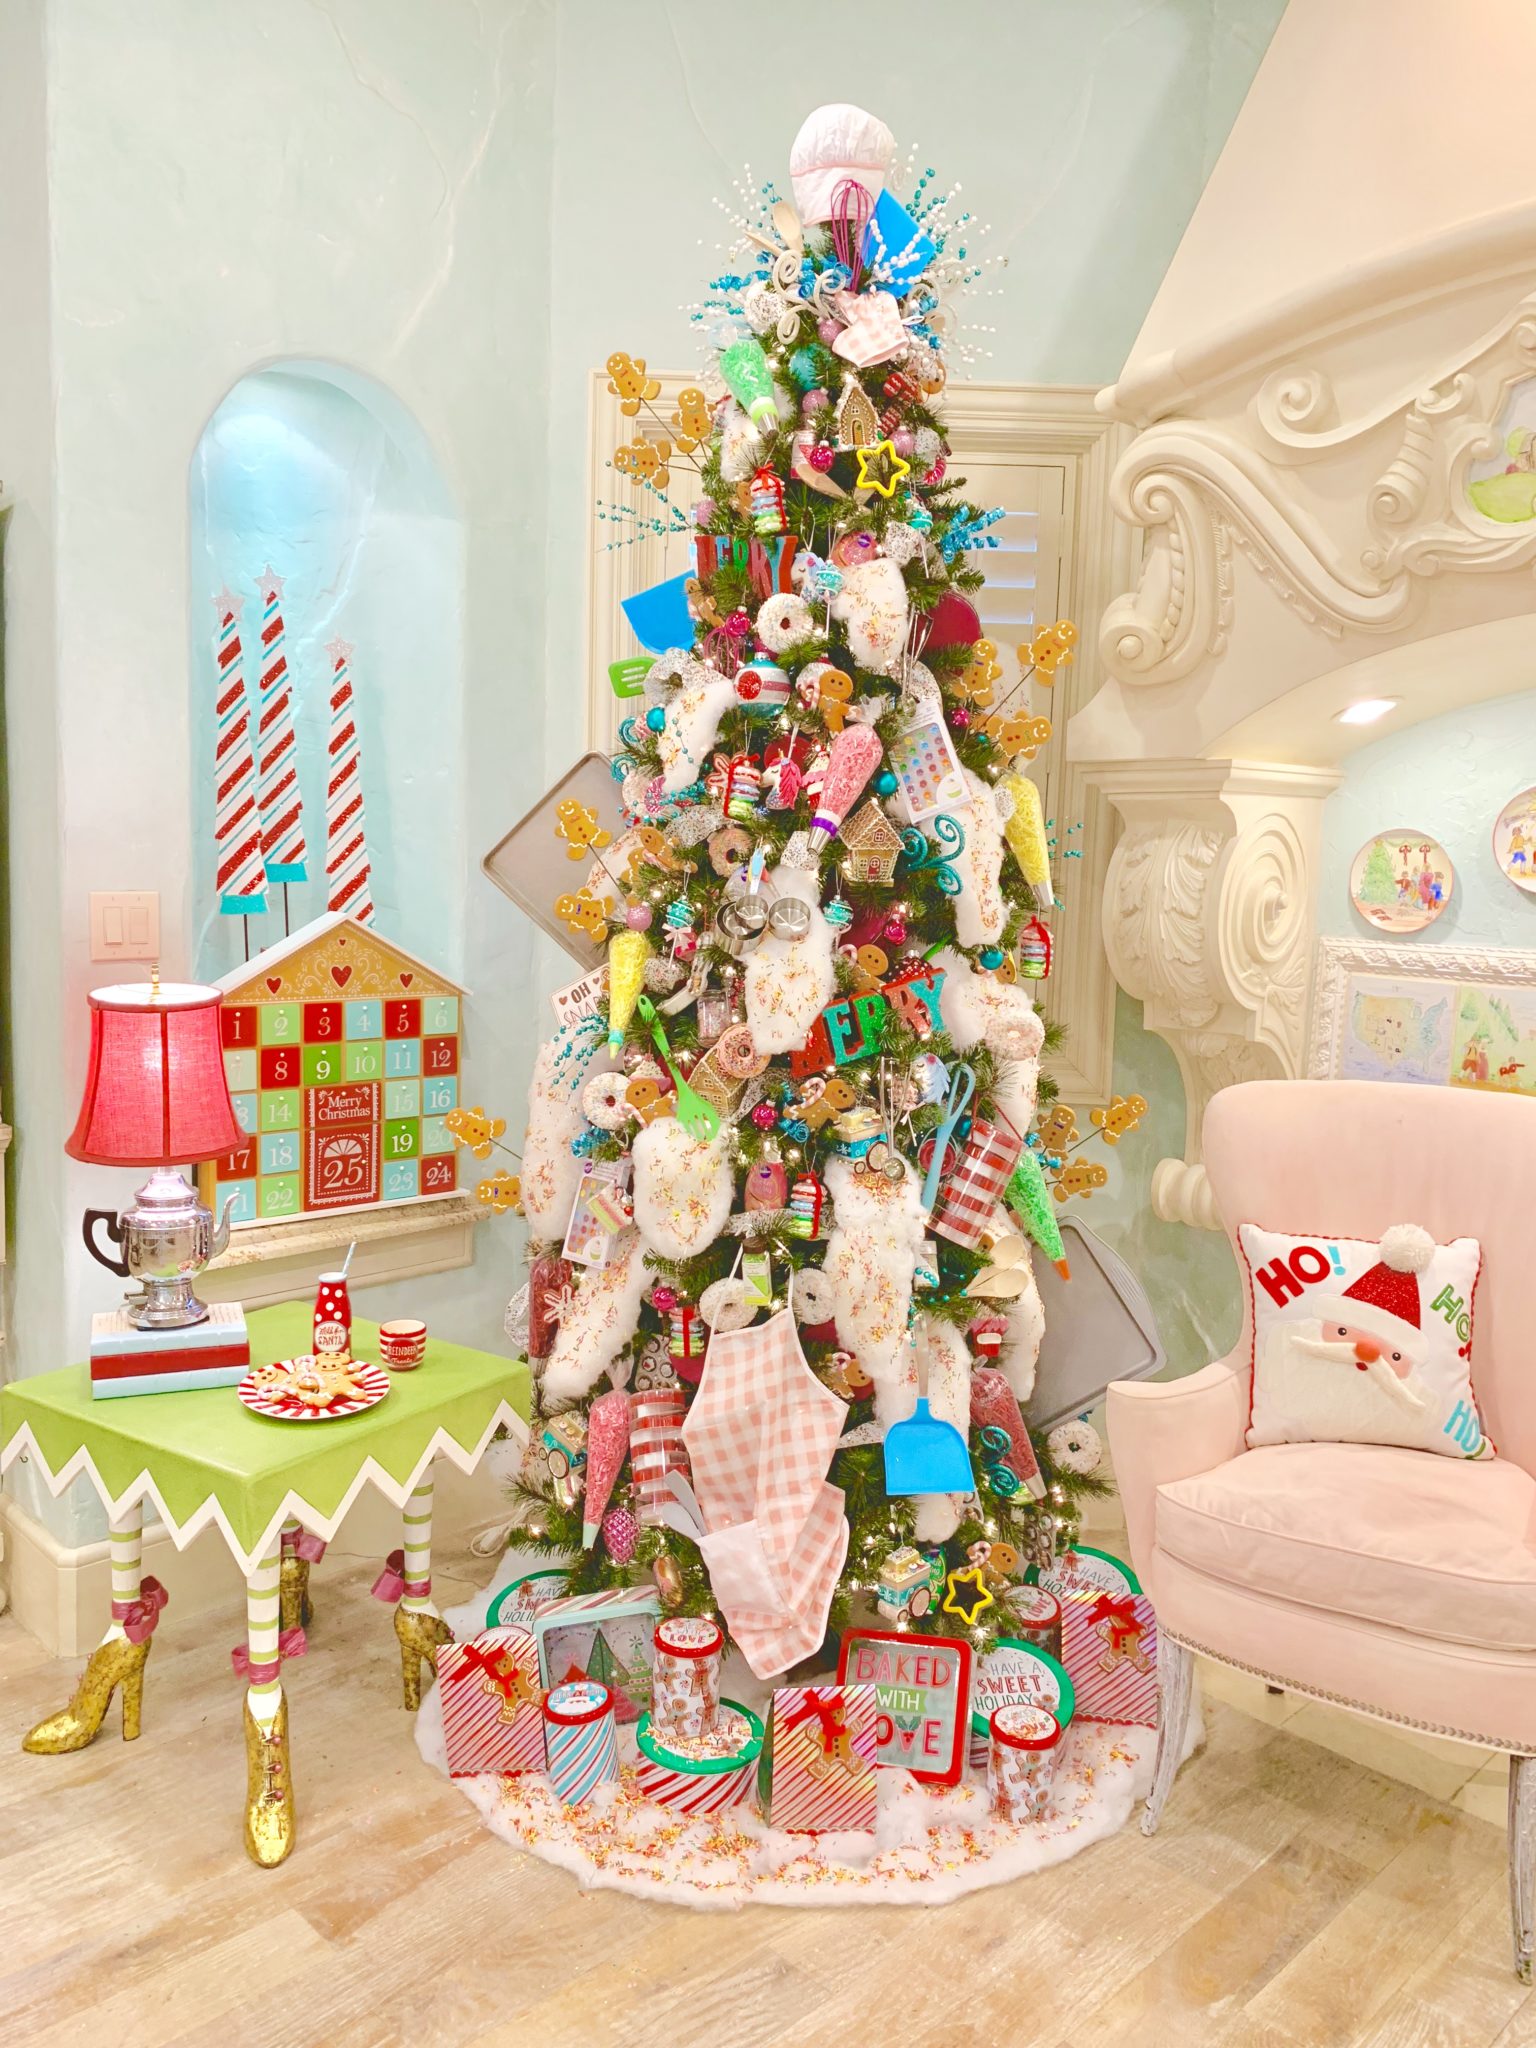
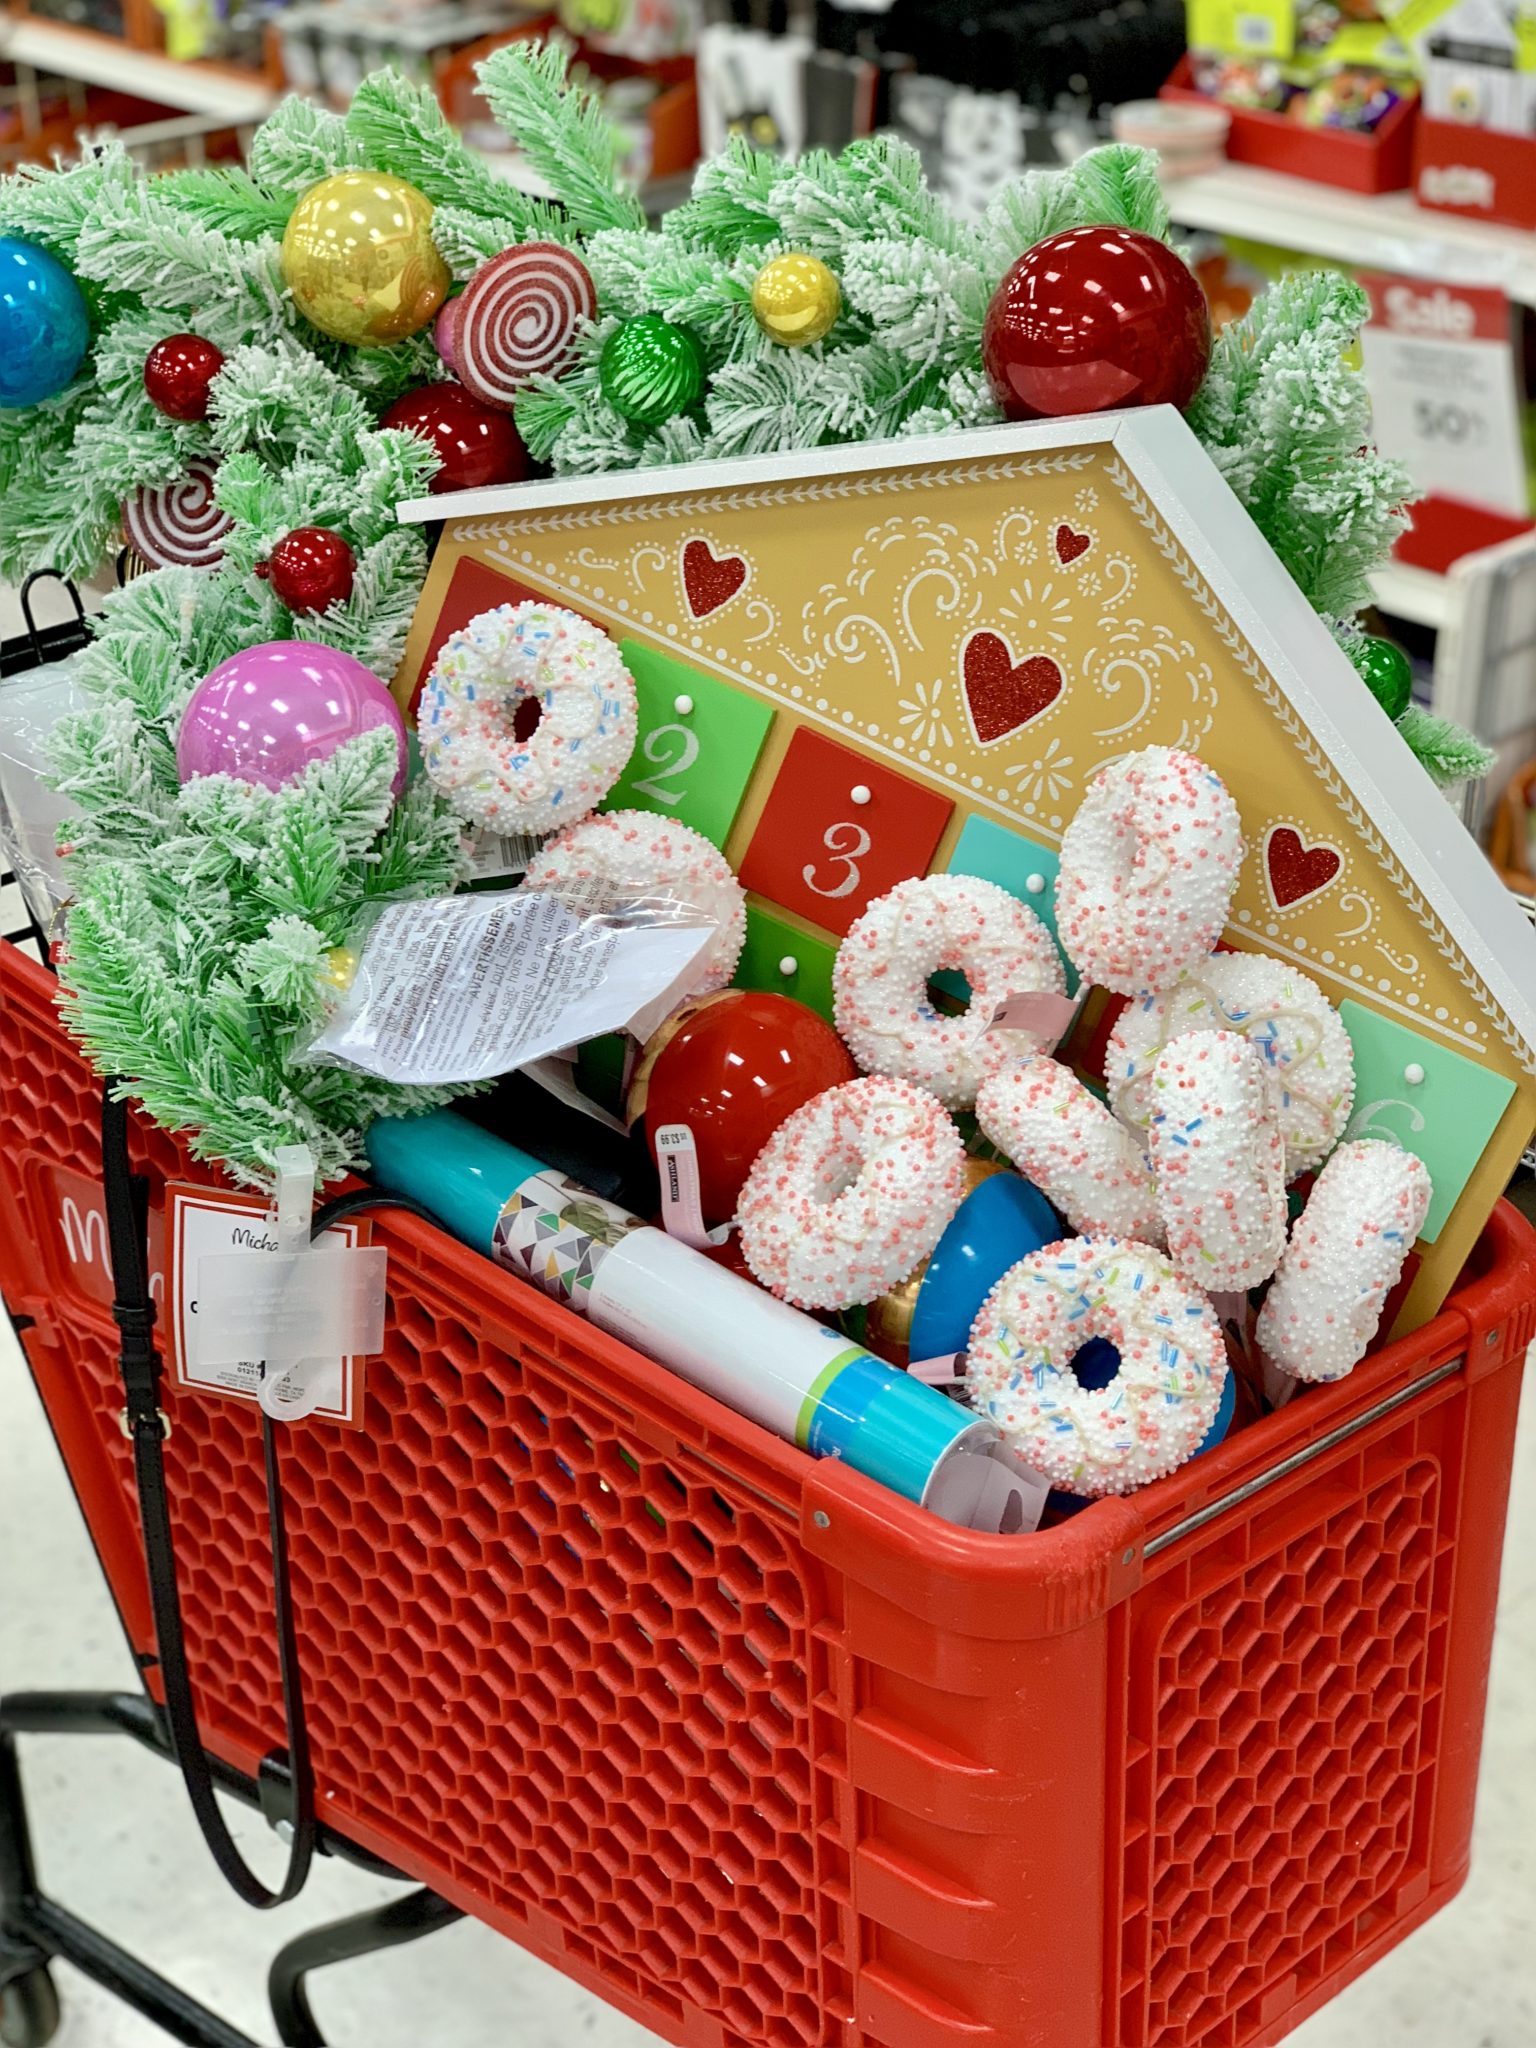
I started with a gorgeous Pre-lit 9-foot Willow Pine Tree that Michael’s sent me! This tree is great because it ships free, plus it is quick and easy to assemble. There is only one plug and when you connect the parts, it automatically turns the new section on… so cool! After the tree arrived I made a trip to my Michael’s store for “ornaments.” Since this tree concept is definitely out-of-the-box, I started in the BAKING SECTION!
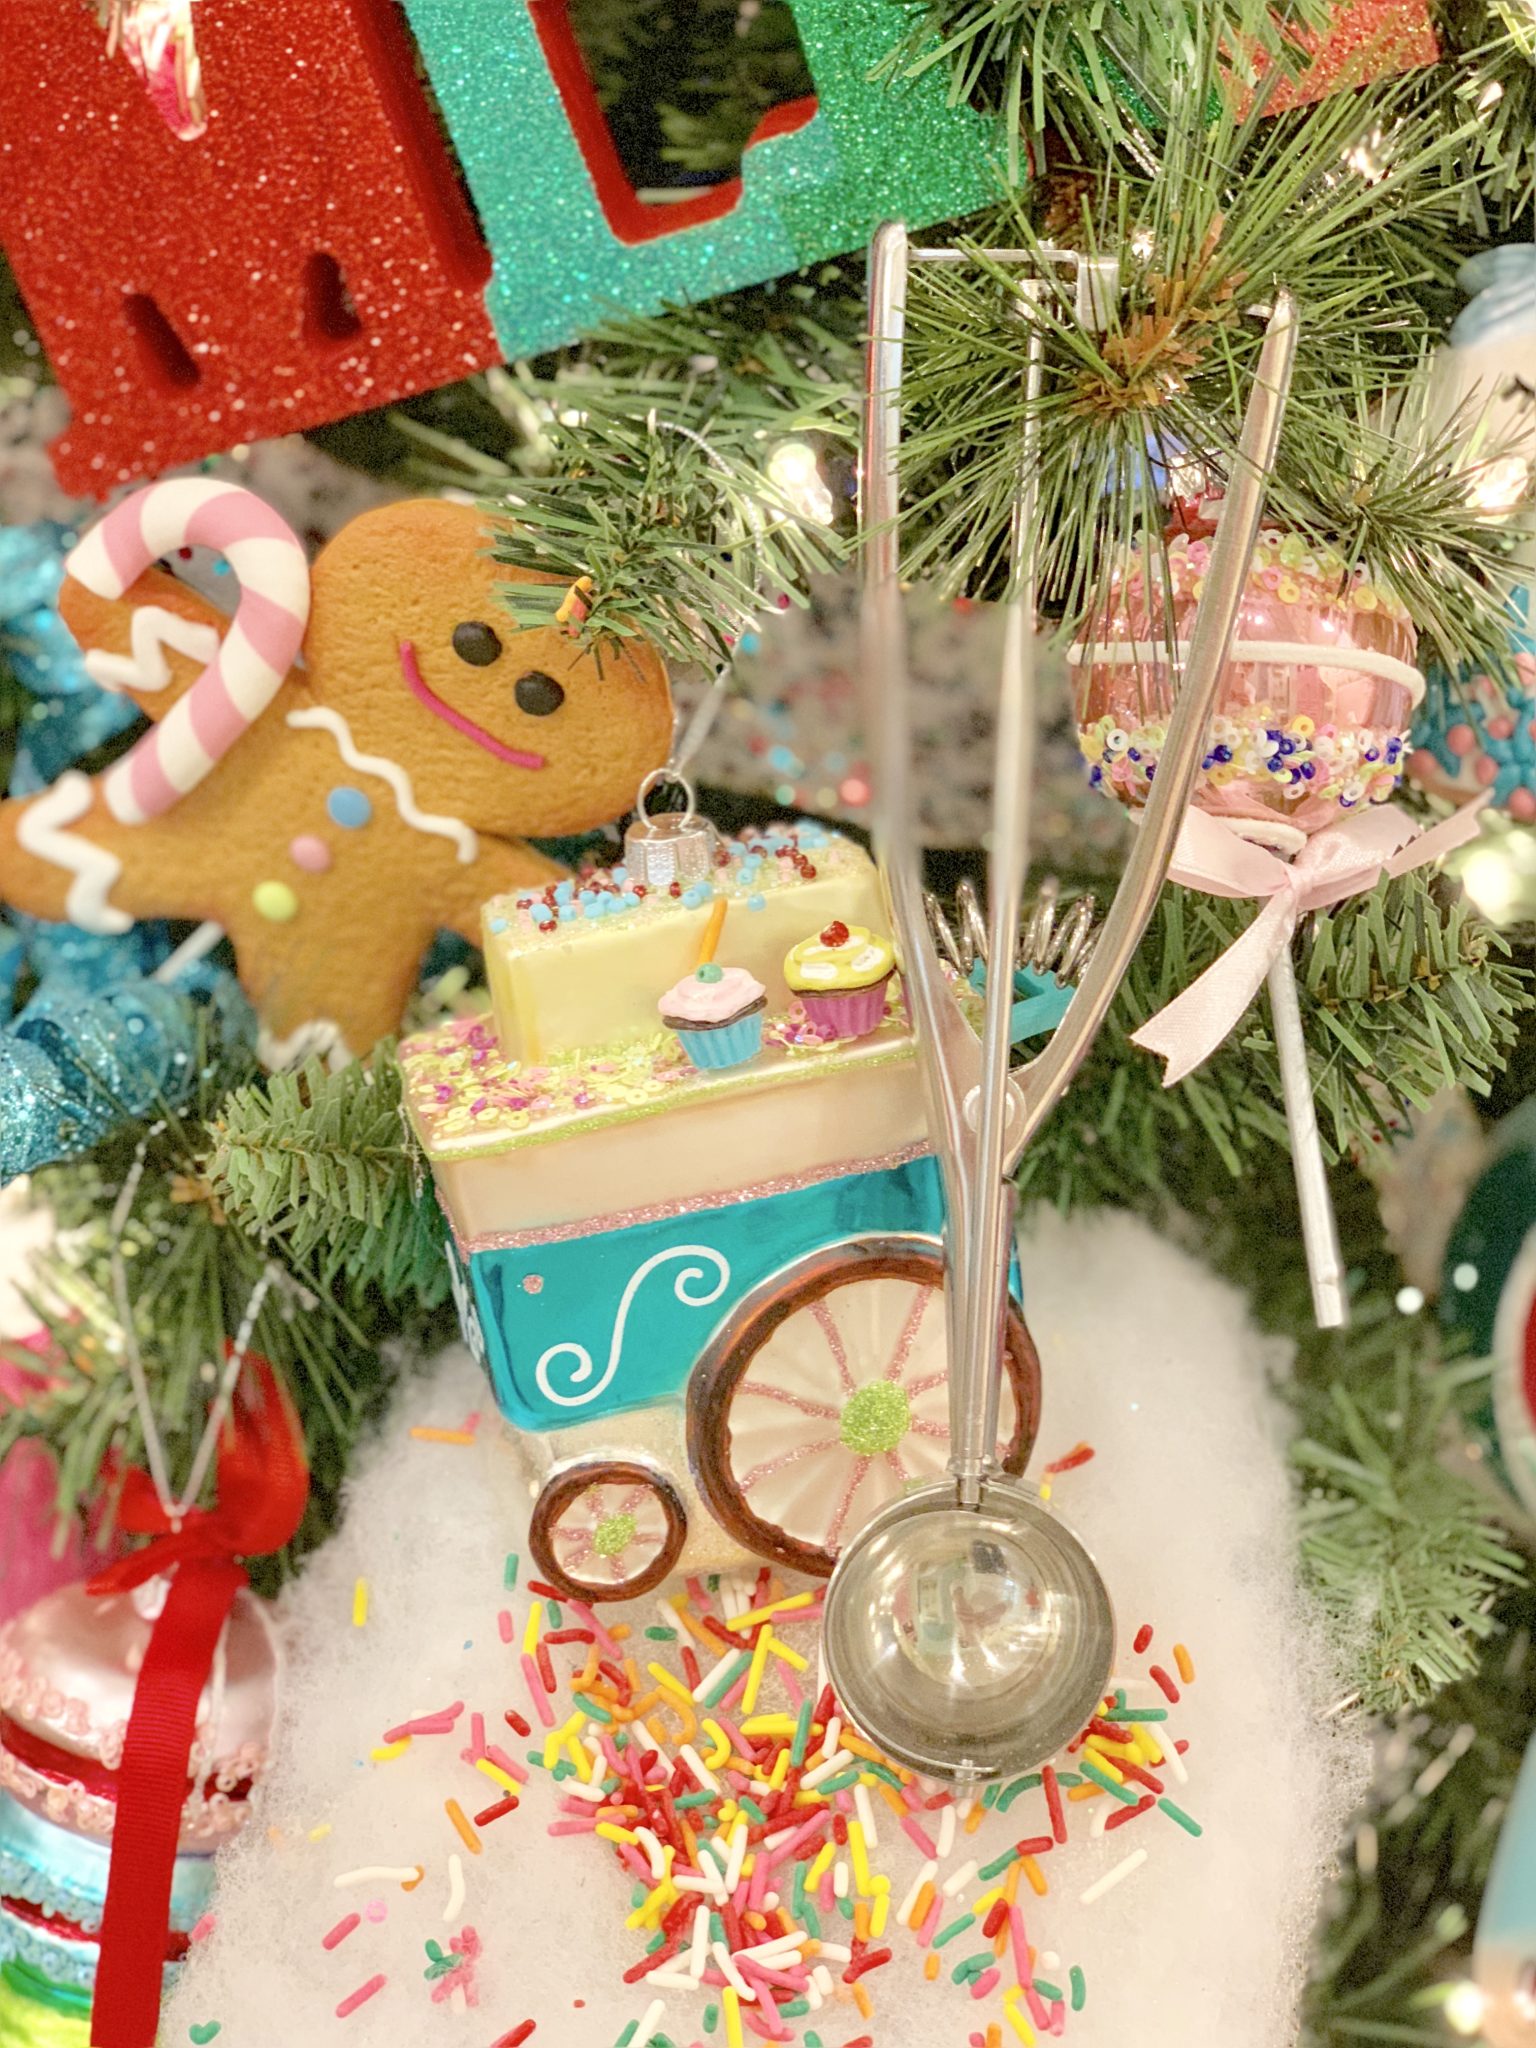
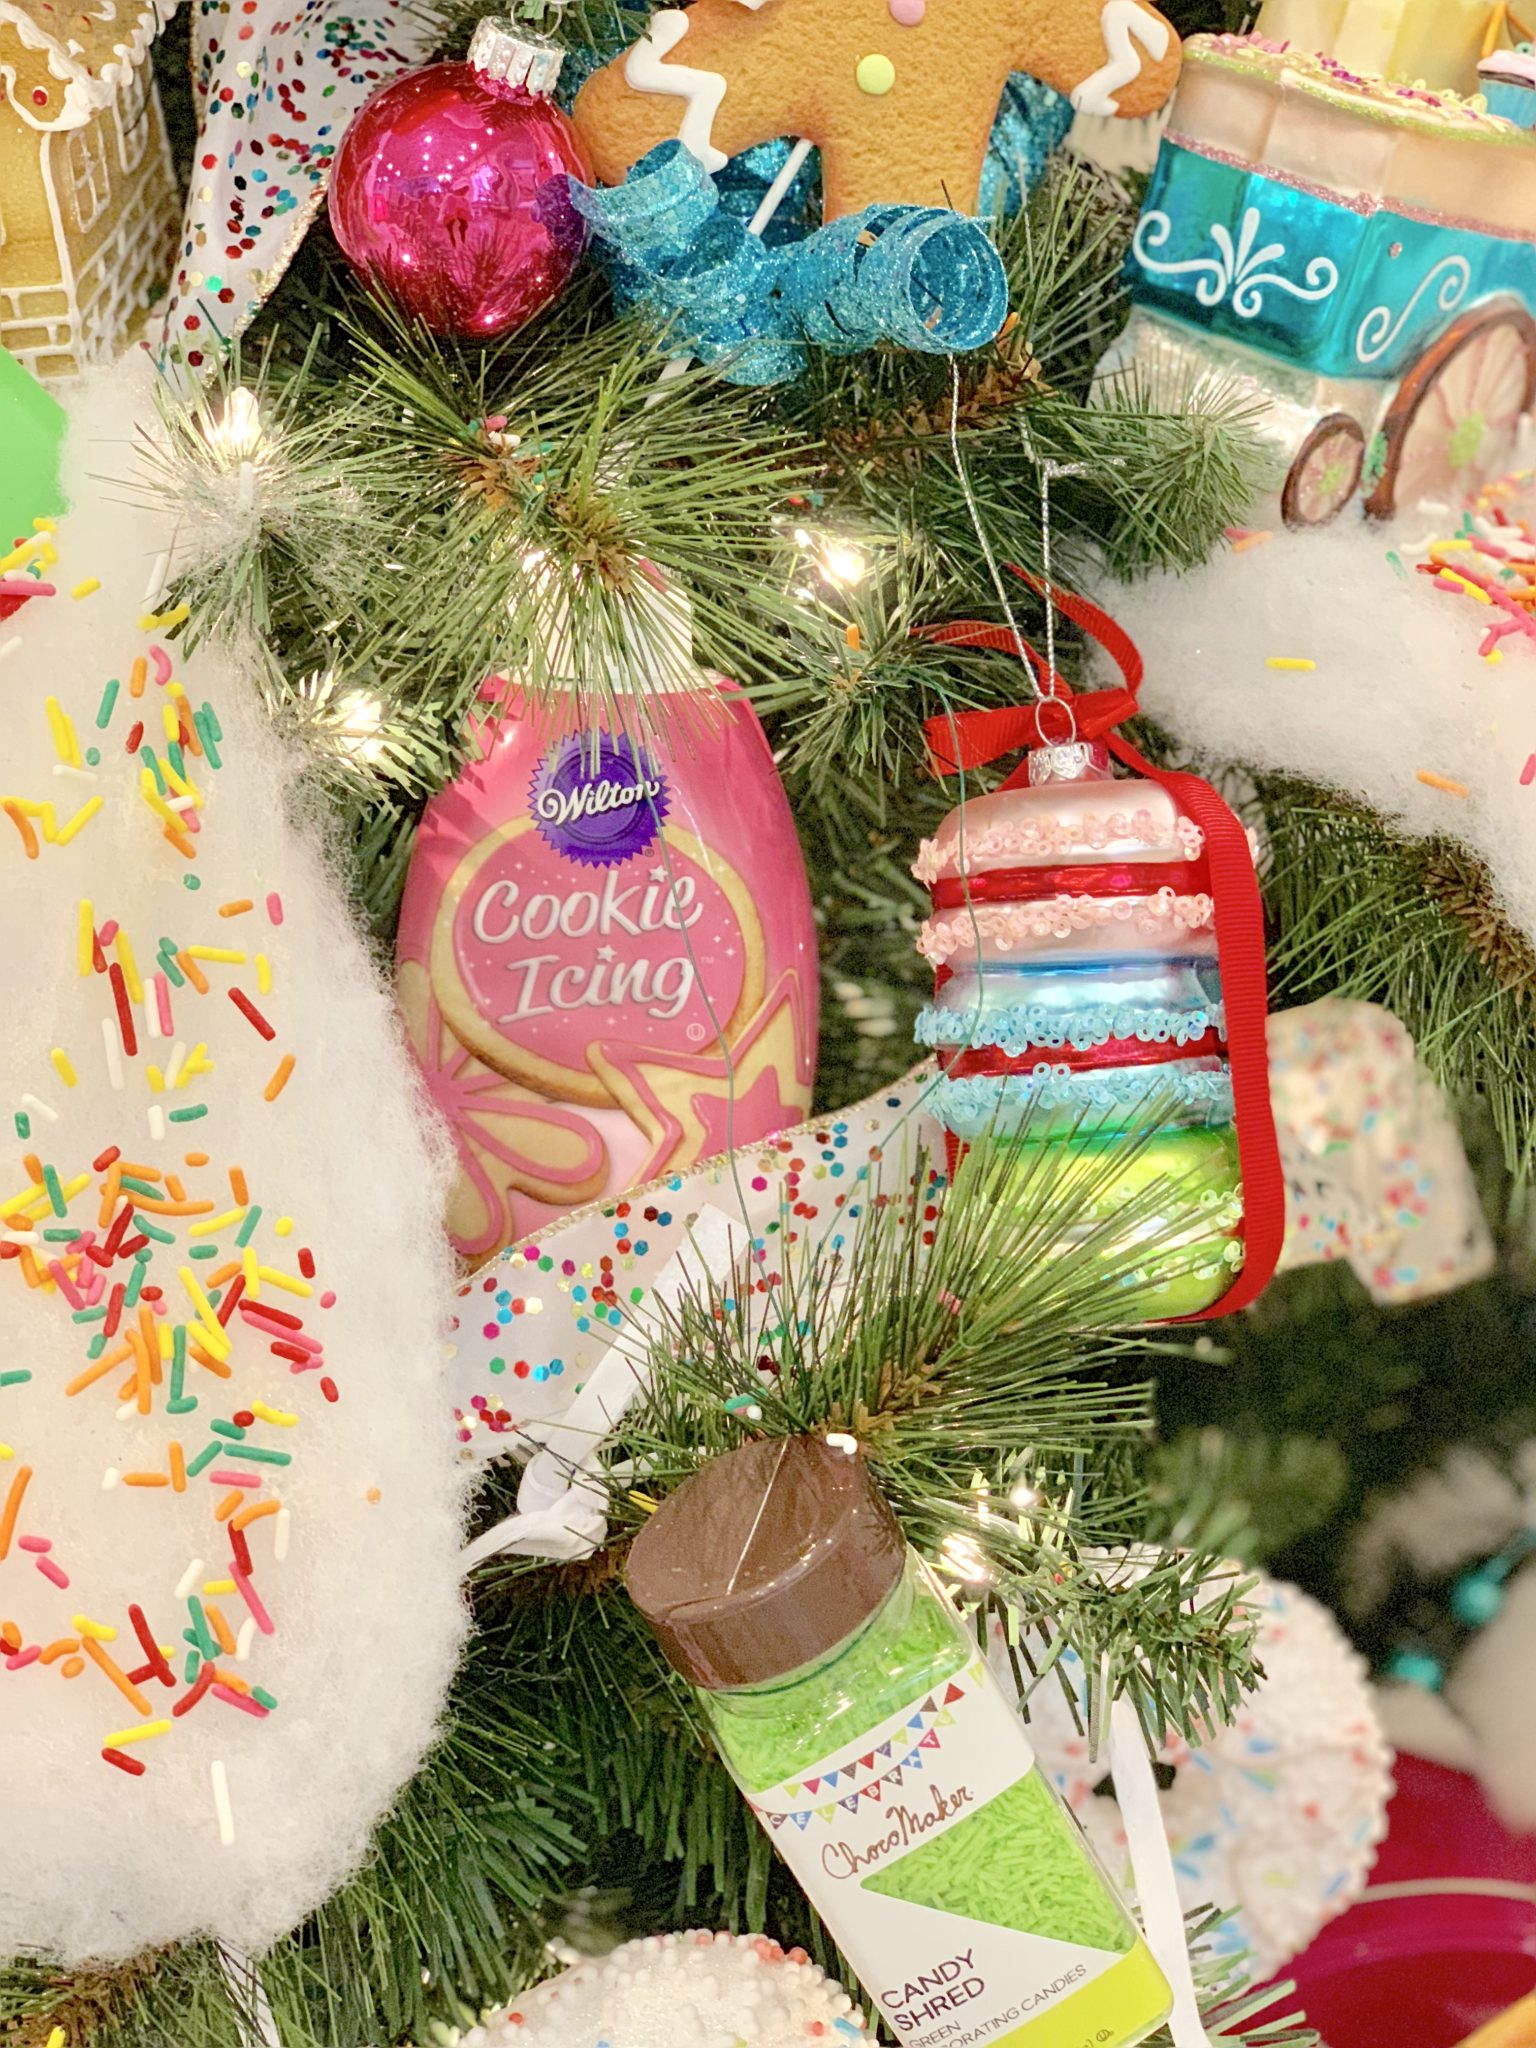
I grabbed all the necessary tools to make cookies: measuring cups, spatulas, icing smoother, cookie scoop, cookie cutter, and cookie sheets.
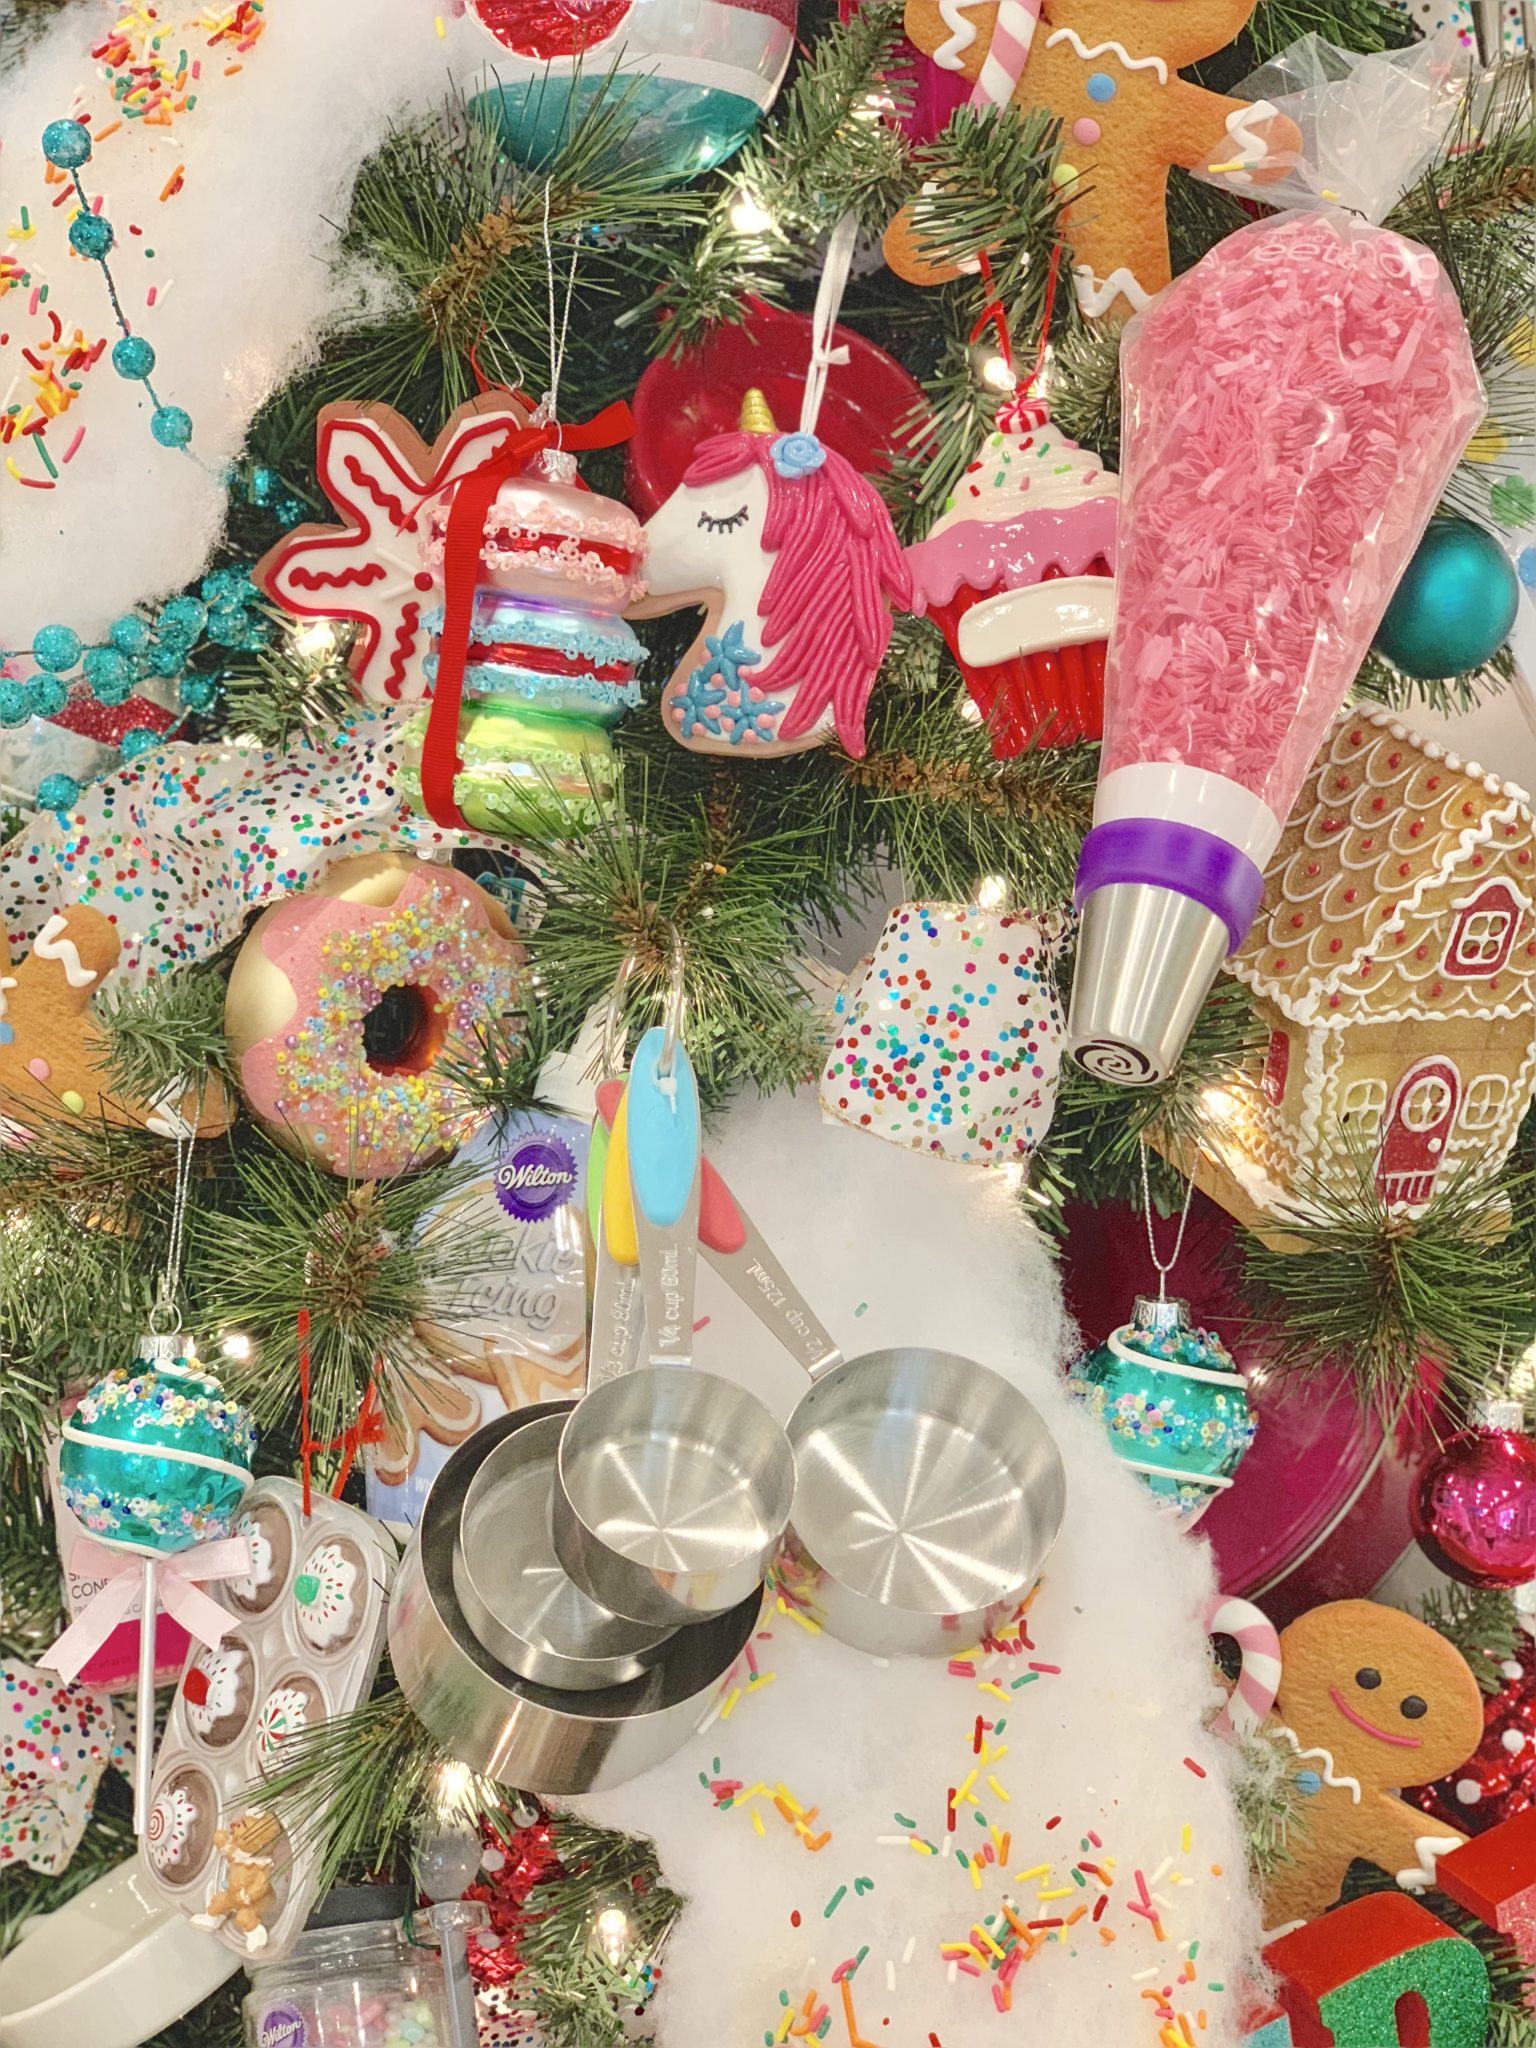
I also found some other adorable traditional ornaments and picks that are along the “baking” theme and added them into the mix: sequin macaroon stack, gingerbread men cookies, glitter donuts, a slice of cake, ice cream cones, cupcakes, and sequin cake pops!

STOP IT RIGHT NOW….. How cute is this dessert cart ornament??!! I bought every one my store had!
Next, I picked out items to decorate the cookies: icing, sprinkles, decorative baking flowers, disposable icing bags, and a cake decorating set.
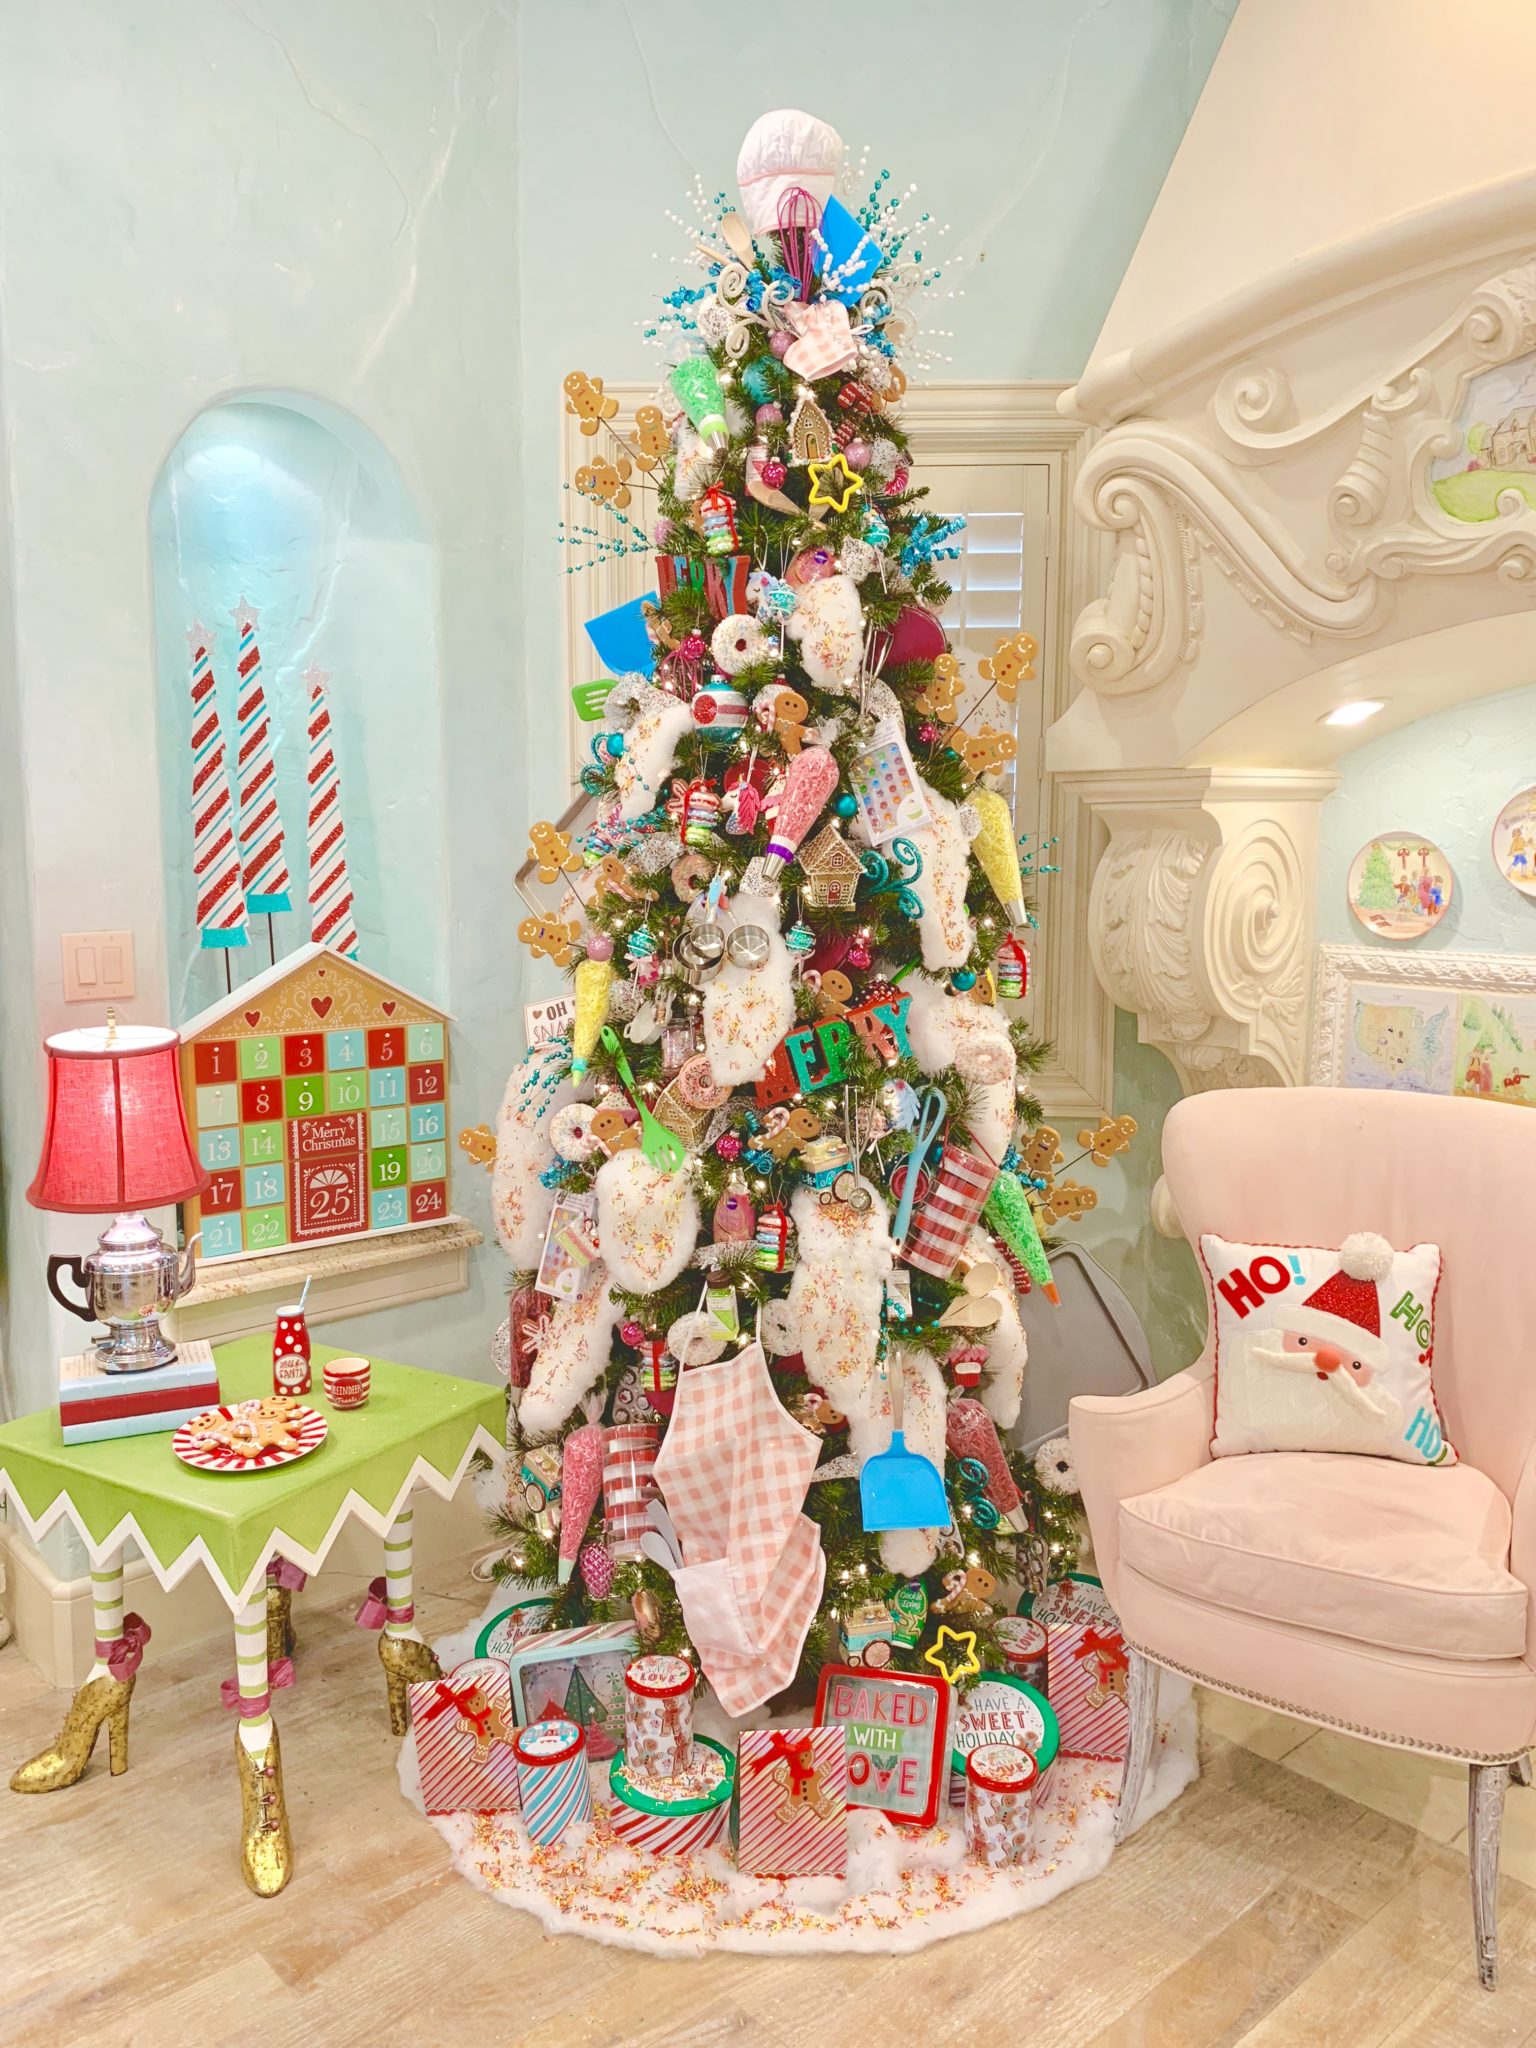
Let’s now move on over to the Christmas Section!! All the Michael’s Decor Collections are fabulous, but I love the Merry Memories the most! It has all the colors I adore, and lends itself to making the merriest memories of this season!
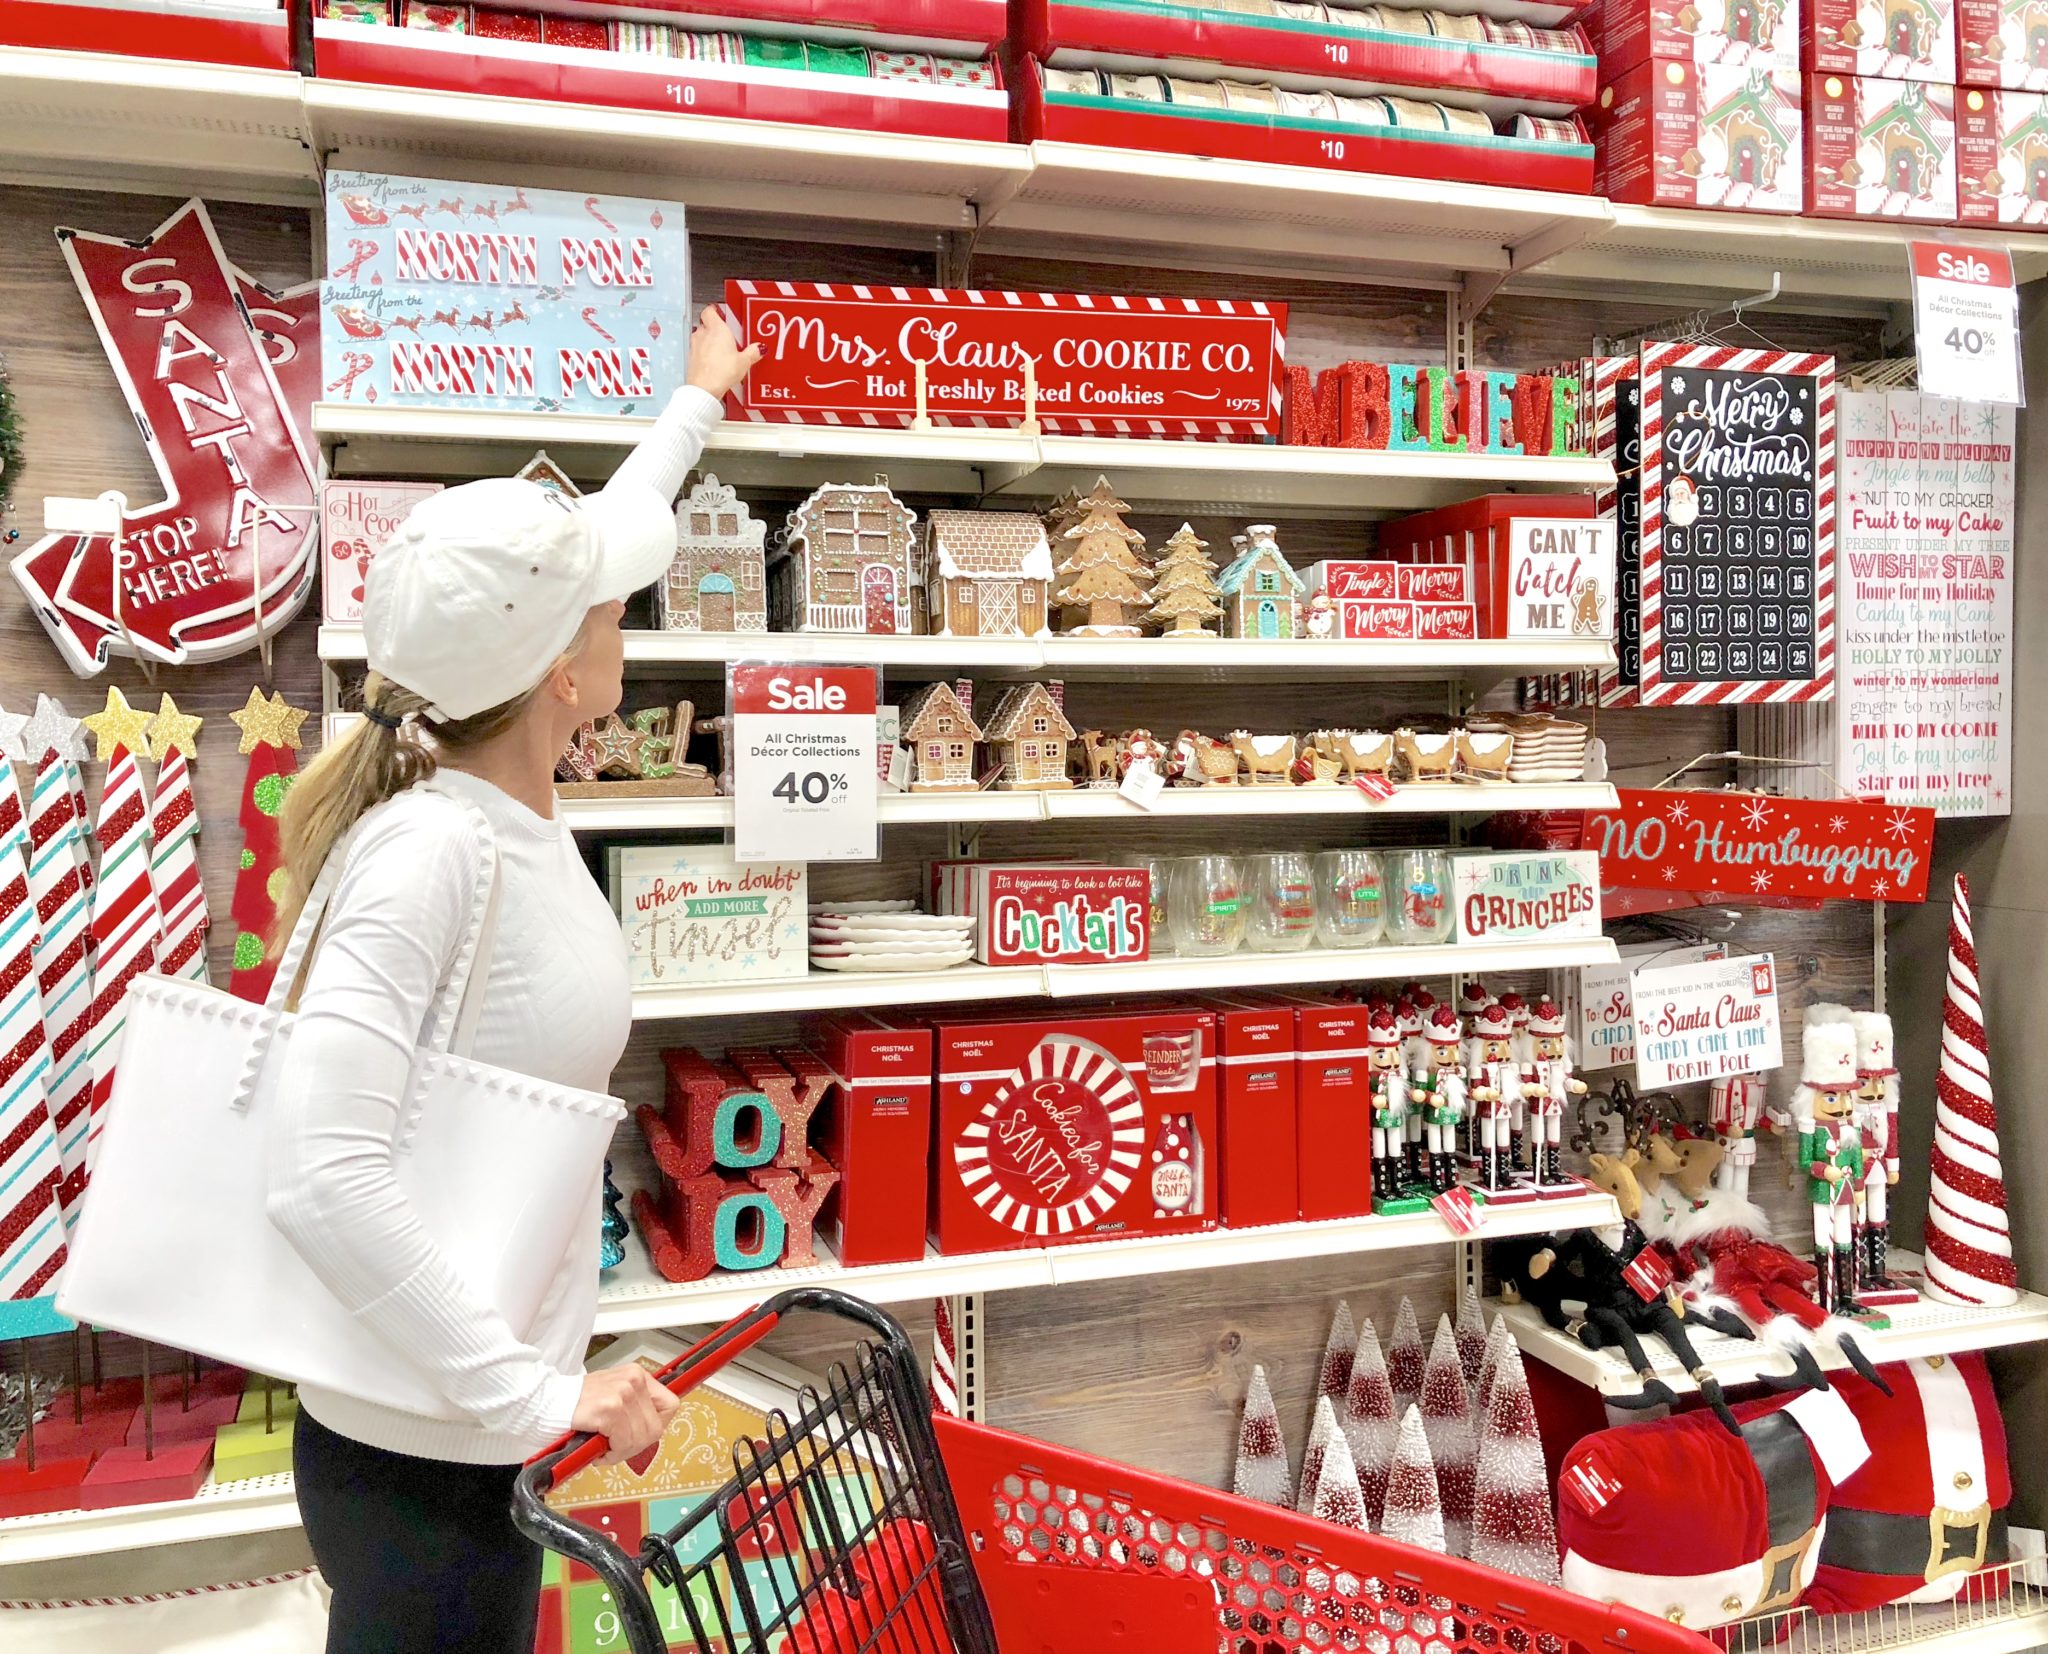
I had so much fun browsing the store and walking every aisle, I think they thought I had moved in… giggle 🙂 I also grabbed this super-fun- mint-green garland to wrap my light fixture in the kitchen!
Once home, I separated all the items into groups, laid them out by size, and let the fun begin!!
Step 1: The ribbon ALWAYS goes on first when decorating your tree. Be sure not to just “wrap it” around the tree, you need to do some weaving in and out to give it a fluid movement!
Step 2: I added Buffalo Snow to create the illusion of blobs of dripping icing on tree branches. After I got the icing situated I sprayed Krylon All-Purpose Spray Adhesive to the globs and then sprinkled sprinkles on top! I LOVE how this turned out!
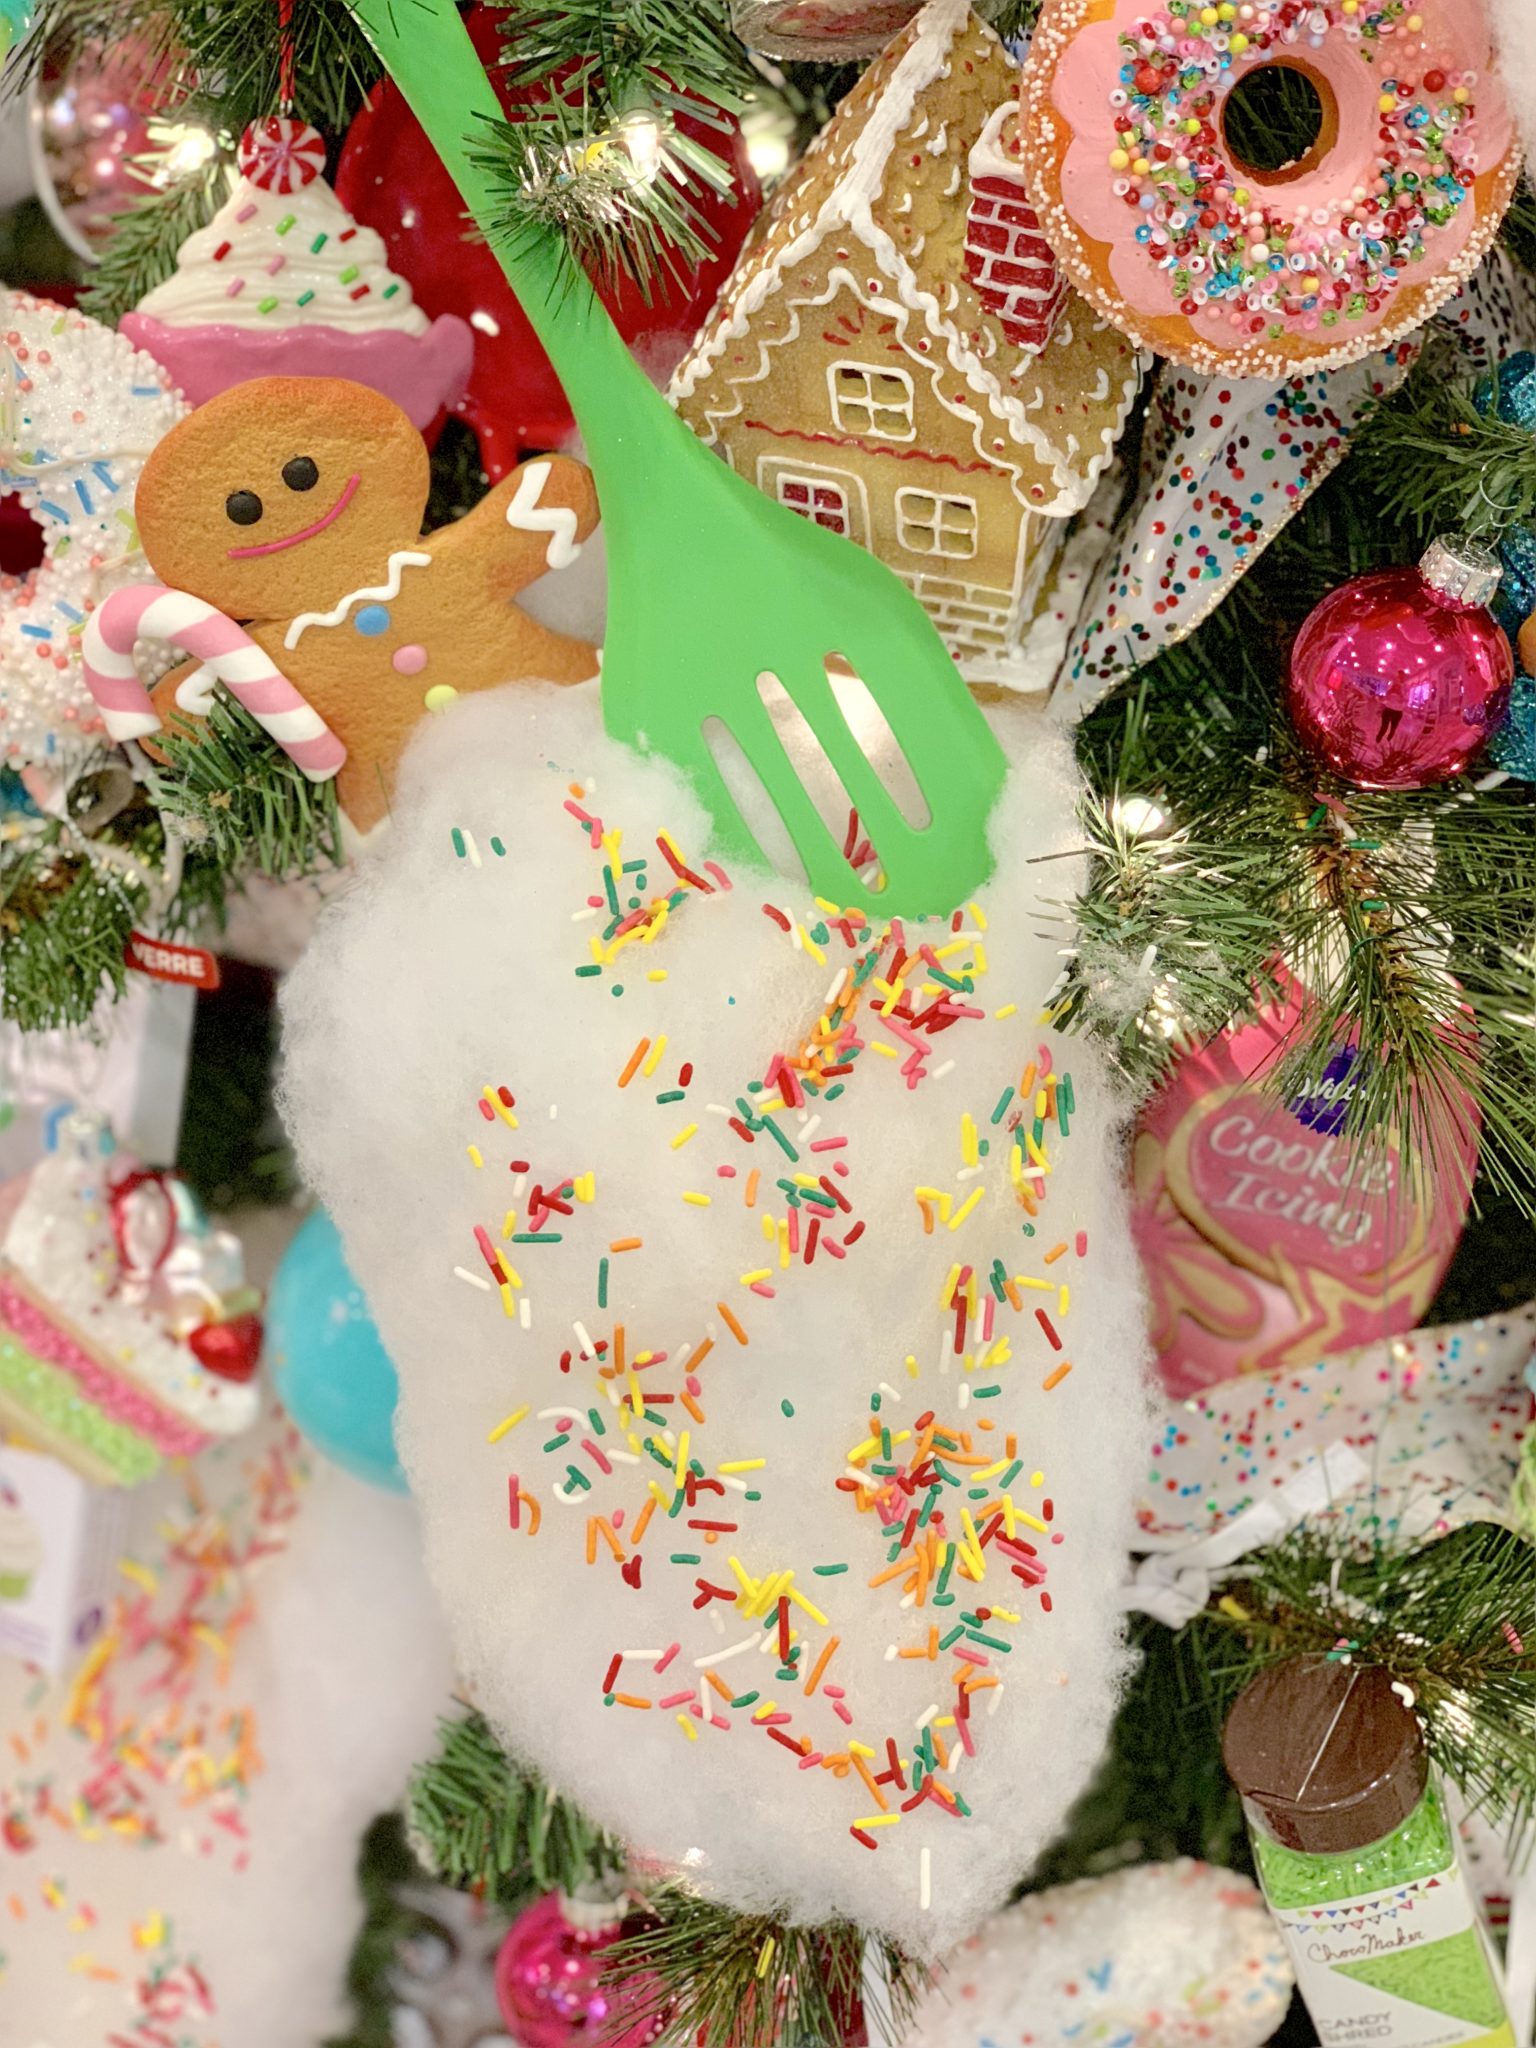
Step 3: As much as I love the scene from so many movies where they put the tree topper on last and it lights up the whole tree, this actually is NOT the way to do it! If you wait to do it last, you risk messing up the ornaments below because you hit them with your ladder or your body! DO THE TOP OF THE TREE FIRST! For my topper, I started with this Tasty Treat Chef’s Set! It’s the perfect pick for a “Baking Tree” and will fit my daughter perfectly! I placed the chef hat on top first (stuff it with some cotton so it stands up) and then built around it with glitter coil picks, glitter berry picks, whisks, a blue spatula, wooden spoons, and the chef mitt (this, and the apron, come with the set).
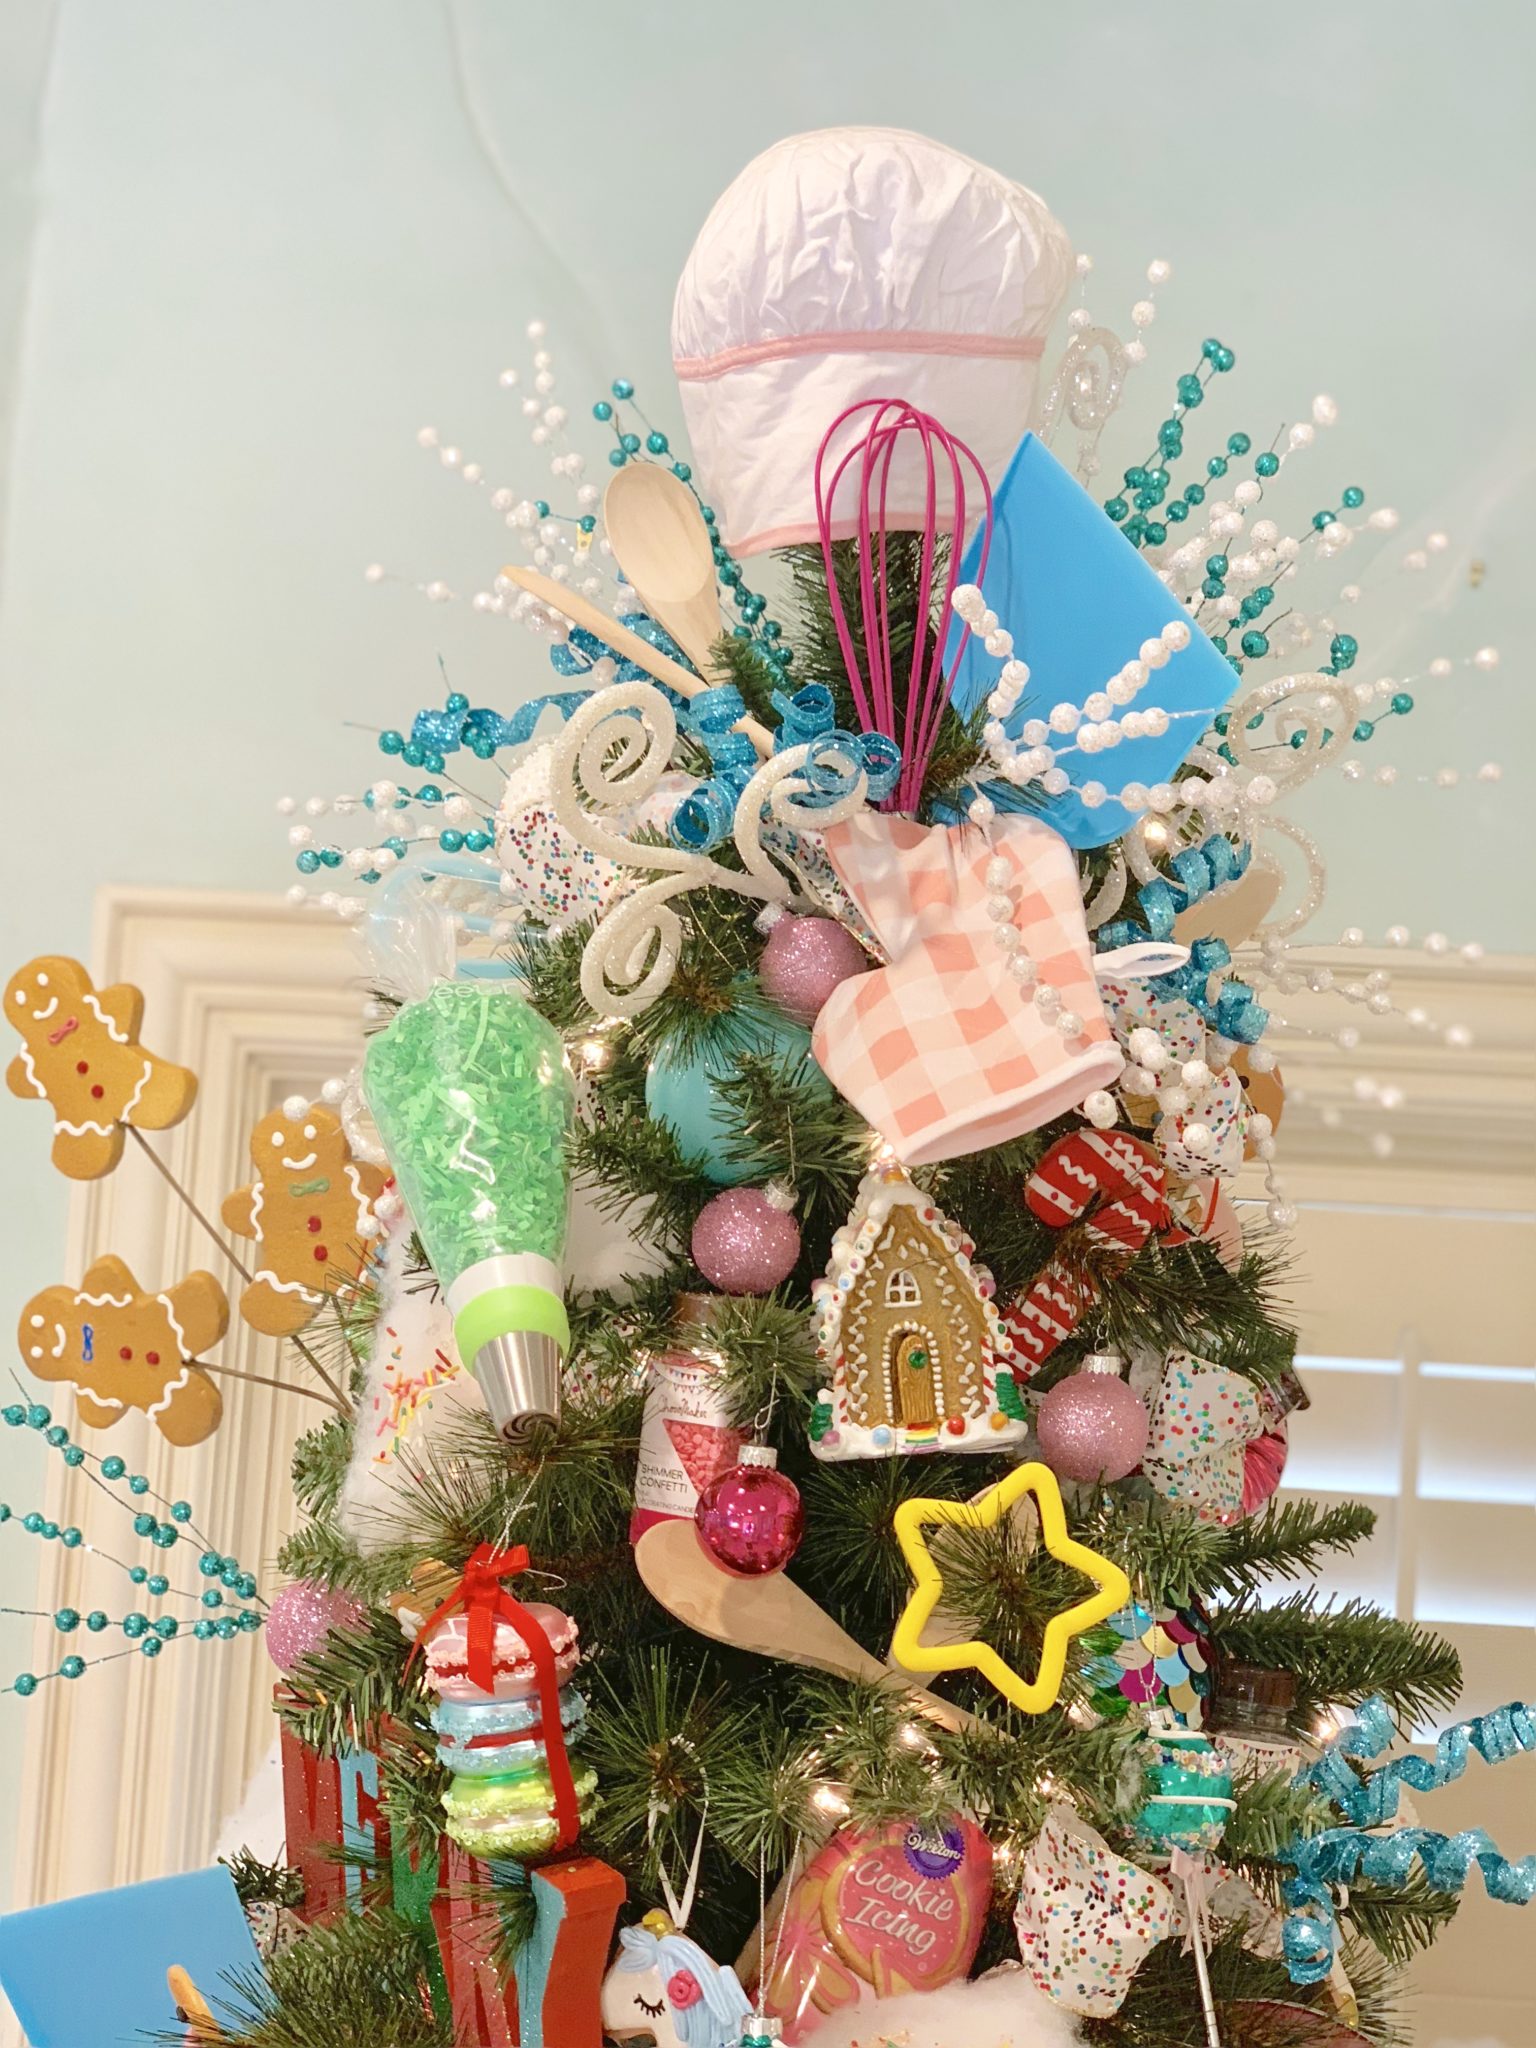
Step 4: I moved to the “ornaments”, always starting with the BIGGEST FIRST! For me, that was the cookie sheets! OK…. I have a confession to make here! I may or may not have said a bad word after my cookie sheet fell off the tree for the 20th time!! Michaels only had one in the size I wanted so I used one of my old ones. It is a little heavier than the Michaels one and I had the hardest time getting it to stay situated in the tree! First I tried just positioning it in far enough hoping the branches would support it, then I decided to try duct taping it to a branch or two, BUT FINALLY, I resorted to hot gluing a corner of it (use duct tape – mine was already on the back… giggle… to put the glue on to so you can easily remove it) to one of the branches. We may lose a few needles on the tree at removal, and you may have a better idea (tell me if you do!), but it worked! I then systematically go from the largest ornament to the smallest (I do each ornament all over the tree first – in a zig-zag pattern – before I move on to the next ornament; this way we don’t run out of an ornament without getting it positioned throughout the tree).
Step 5: For the FINISHING TOUCH I globbed more “icing” (Buffalo Snow), onto the floor to make a TREE SKIRT!! I used Cookie Tins as “presents” so when we have our cookie-baking party, our friends can take the cookies home in a cute container!! SO FUN, and more undecorating happening! I then sprinkled more sprinkles all over the “icing” and tins!
Accessorizing the Rest of the Space!
I think my favorite item from the Merry Memories Collection is this Gingerbread Advent Calendar! Our family loves doing the countdown to Christmas so this perfect! To complete the look, I nestled three Merry Memories Trees behind!
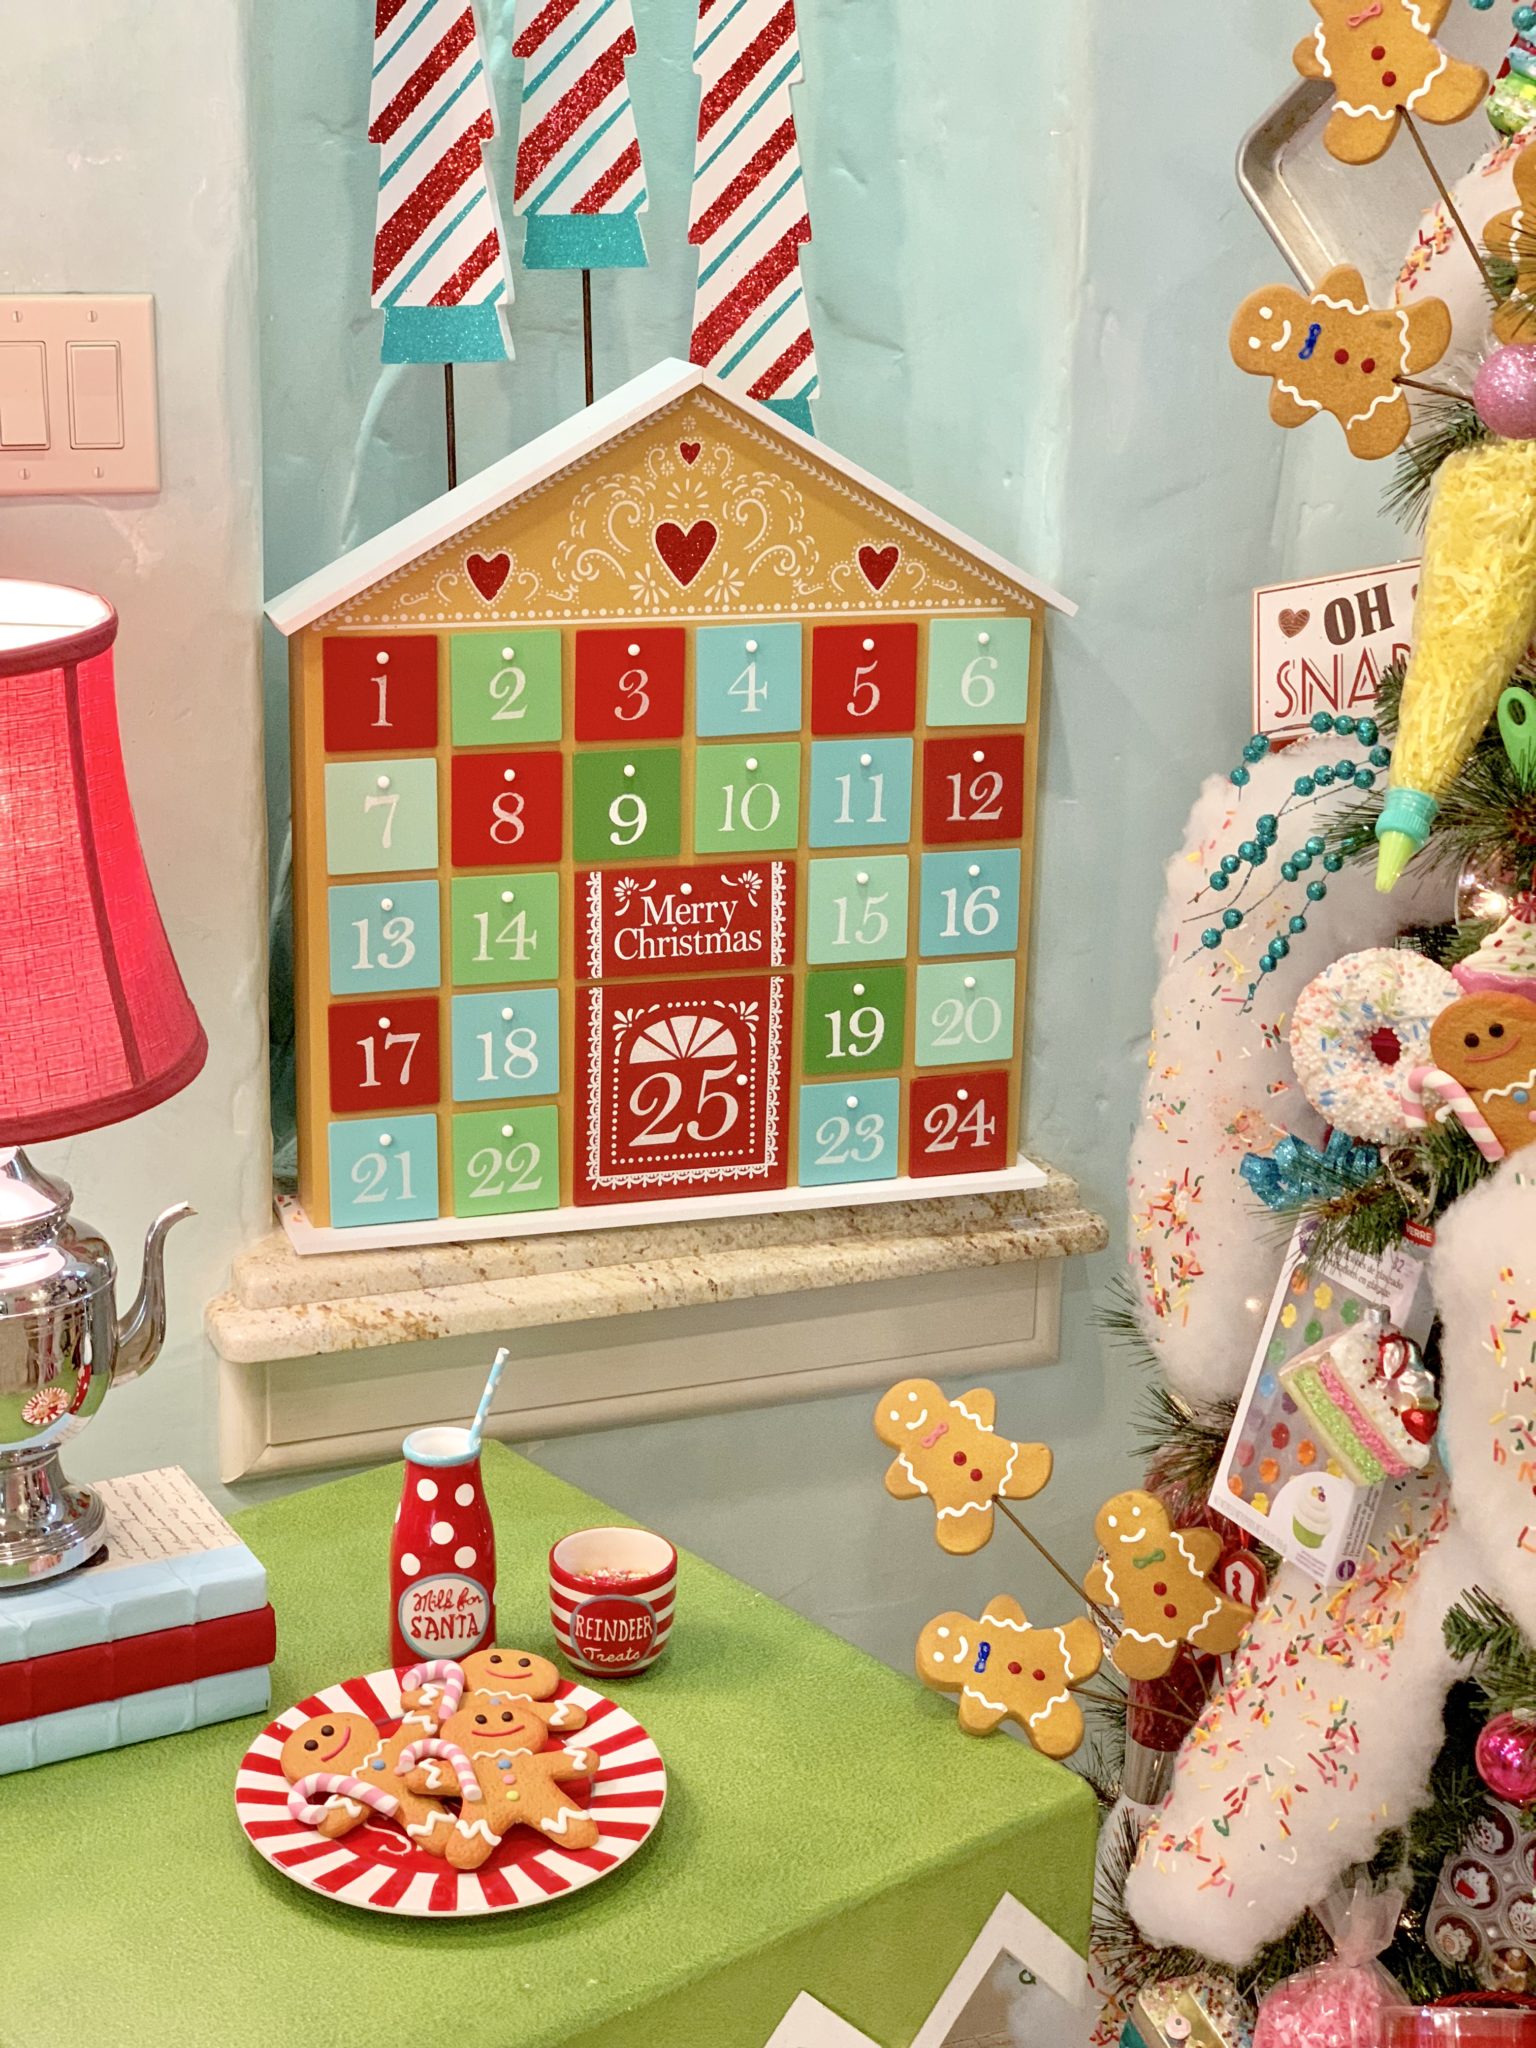
I dressed the side table and chair for Santa and his reindeer with this cute Merry Memories Plate Set and a soft HO HO HO Pillow for Santa to rest against while he eats his cookies!
The look is COMPLETE and we are ready to enjoy this tree until it’s time to have even more fun….. UNDECORATING it!!!!
I hope this has inspired you to make some Merry Memories this year!! I truly LOVE the idea of inviting friends over for a cookie party and undecorating the tree by using the “ornaments” as the baking items!!
Hugs…. Jennifer
So pretty! LOVE IT!